
The journey has begun! First stop – Menards!
Just kidding – I hit an immediate DETOUR sign….it is construction season after all!
Since my planning post I have gone back and forth with the layout of my “Table.” I started doing more in-depth research from the Shanty-2-Chic plans, and started watching tutorials from Ryobi about using a miter saw and circle saw (Video Tutorial). These ladies are extremely helpful and their explanations are very clear, but…
I PANICKED!
This was way more than I had expected, and mostly it is very expen$ive (even to rent the tools).
With my huge teacher salary I needed to choose a different route, but still keep the end goal in mind. I’m still going north, and those big saws are not going to stop me!
So now it is time for a REMIX!!

I noticed my storage cube shelves in my livingroom, it was my Ah-ha slash “Hacker” moment. I looked back at the IKEA Hack I had mentioned in my planning and decided this would be the best way for me to reach my end goal, but avoid the heavy toll on the wallet.
Speed Bump along the DETOUR: this first IKEA Hack did not offer enough explanation for my learning. The picture was there, but you really had to put the pieces together yourself.
However, I did find this fabulous blog One Good Thing by Jillee and she had an entire blog post with ideas on how to Transform and Elevate the Storage Cube.
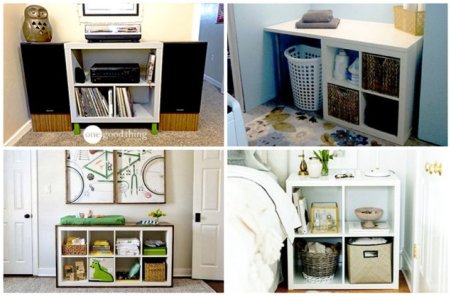
(You should definitely take a look at the remixes on her page).
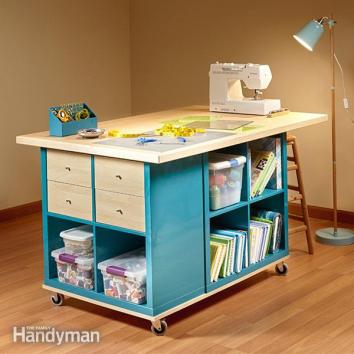
After looking at a few of the images I found exactly what I was looking for from The Family Handyman at thefamilyhandyman.com – a moveable craft table.
This is very similar to what I was envisioning for my “table.” Senior Editor Travis Larson gives explicit steps and lots of “How to” clips for some of the basic skills in hacking.
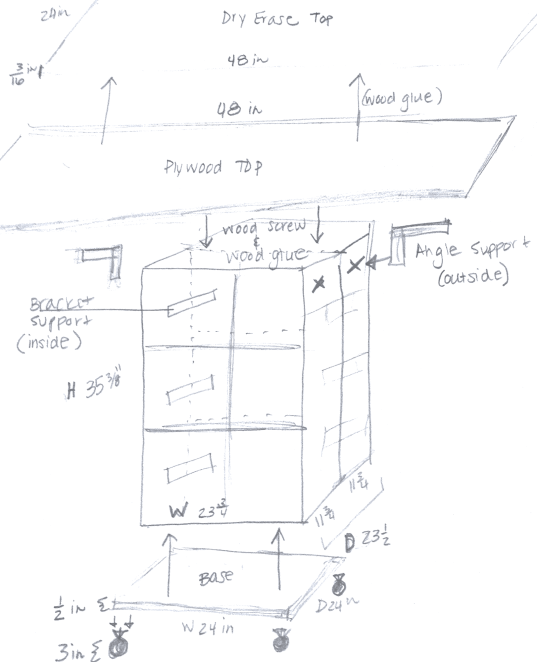
After getting some ideas from his site, I drew up this blueprint and made a list of what to look for. You can see I am still planning to incorporate the table space to hang over the base for students to pull their chairs up to.
So now – back on the road again to Menards:
On my list:
- Birch Butcher Block (top of the table)
- 2 – 3×3 Storage Cubes
- 4 – 3 inch casters with locks
- 16 – Wood Screws
- Plywood (for the base)
You know how you go into Target to get those items on your list, and walk out with a lot more than you expected?
Well I didn’t necessarily walk out of Menards with a lot more, but I definitely hit a jackpot!
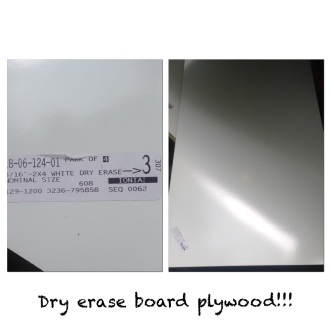 The Birch Butcher Block I was planning on getting was really cool, and if I were making this for my house I would consider making the purchase. But when I was walking through the aisle with plywood, I found something even better (plus it was only $10 compared to the butcher block for $80). Dry Erase Plywood Boards->
I am so excited to make this the top of my table! My students will be able to use the surface in another way. I think it will be super fun during math, and easy to clean up (added bonus)!
What I came back with after my journey to Menards (I’m sure I will be back):
Birch Butcher Block2ft x 4ft White Board Sheet (top of the table)- 2 –
3×32×3 Storage Cubes - 4 – 3 inch casters with locks
- 16 – Wood Screws
- Plywood (2ft x 2ft for the base and 2ft x 4ft for the top)
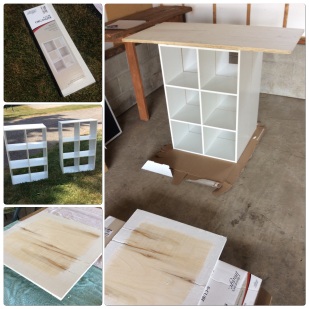
Here is where I leave you on the journey – I put together the two storage cubes, and I painted/primed the base and top piece of plywood. (I learned after building the first one, to organize the hardware.) Check out what I mean in my video:
The next step on my journey will be figuring out how to connect the pieces.
I have made comments on The House of Wood blog, as well as tweeted to The Family Handyman, so I hope to hear back with their suggestions on how to best put together these shelves to create my “Table.”
If you have any ideas for me – please leave a comment below!

I absolutely LOVE this idea! You have done a great job so far documenting all of your steps, resources, and materials. I feel like I can also make this table on wheels. For my project (Changing my car’s oil), I also found thefamilyhandyman.com extremely helpful. It’s interesting to see the wide range of DIY projects in just that one website – they’re definitely doing something right! I think that it’s a great idea that you tweeted out to a couple resources for support or ideas. I might do this too! I’m interested if they will respond to you. I have one suggestion, for after your table is built. You could add magnetic strips to the upper areas within the boxes and even under the hanging part of the table. This could help maximize your storage space in your table. Good luck with finishing your project, I’m excited to see the finished product! 🙂
LikeLiked by 1 person
Love that we shared a similar resource! I still haven’t heard back from the other websites or my tweet – but I will keep trying!
Love your suggestion!! I was actually thinking about adding metal sheeting to the blank sides of the shelving to use magnets on….but I think weight will become a factor so I will have to see what happens when I put it all together! Thanks for reading!
LikeLike
Wow! Inspiring project! You’ve clearly put some time and effort into the thought process of getting organized for your NLP. The images you’ve used, including video are super helpful and fun to watch. I totally appreciate your enthusiasm and it is obvious you are fired-up when reading your post. Keep up the good work!
LikeLiked by 1 person
Thanks for taking the time to read it!
LikeLiked by 1 person
Wow! Your storage table is really coming along. I appreciate your honesty and humor in your post. It makes for easy and fun reading. Hearing your interpretation of the resources helps guide readers. You did a really good job of breaking down the steps. As I was reading I would start to come up with suggestions for your table, but then you would tackle the concerns I had. Way to go! I was curious as to how the students would be able to slide their chairs up to it if it didn’t have an overhang. The blueprint drawing was a great visual and your comments mentioned the overhang. Great problem solving! I was wondering if the plywood would be textured for the table top, but LOVE that you found whiteboard plywood. Who knew they made that? That is awesome that it was cheaper and way more versatile. Your students are going to love it!
Is the whiteboard plywood pretty sturdy and not bendy? I was going to say if it wasn’t you could apply another piece of wood under the whiteboard. Do you plan on painting your project or leaving it white? The white is very clean and crisp, but color would be fun too. It might even be fun to paint (if you have enough paint) the underneath side of the whiteboard table top to give it a splash of color. I cannot wait to see your final project post. 🙂
I love that you did a time lapse and incorporated that into your video. Great idea! I may do that for my final post of my Network Learning Project. I think it really gives readers a sense of your process.
LikeLike
I am working on creating a “real” blueprint, which I hope with answer some of your questions – so stay tuned.
The white dry-erase plywood will attach to the larger (2ft x 4ft) piece of plywood to make the surface sturdy.
That same larger piece of plywood that I painted white (for now, maybe add color once I can decide on one) is for the underside of the table! I love that you could even visualize the aesthetics 🙂
The smaller piece of plywood that I painted white will be on the base, and here is where I will attach wheels.
I was even thinking about adding metal sheeting to the blank sides of the shelving to use magnets on….but I think weight will become a factor.
LikeLike
[…] (Check out my previous posts here – My “Table” Plan, My “Table” DETOUR ahead!) […]
LikeLike